Welcome to Fookes Software’s support portal
How to convert OST to PST (with or without Outlook)
Aid4mail is the most reliable way to convert OST files to PST. Primarily because it converts email messages without data loss. It also processes faster than the competition and enables you to:
- Convert OST to PST with or without Outlook installed.
- Preserve metadata including message status (Unread, Read, Replied, …).
- Extract mail from orphaned OST files.
- Recover lost email in damaged OST files.
- Have full control over the conversion process.
- Batch-process a large number of OST files.
- Access advanced features for forensics professionals.
For more information about what makes Aid4Mail the best OST converter, please visit our OST to PST page.
Instructions for converting an OST file to PST with Aid4Mail.
If you don’t have Aid4Mail yet, you can experiment with the free trial version or purchase a low-cost 1-month Aid4Mail Converter license. You’ll be up and running in minutes.
Please follow the steps below. For any setting that’s not specifically mentioned, you can either use the default (preset) value or consult the Aid4Mail User Guide for details. You can open it from Aid4Mail by pressing the F1 key.
Step 1: Open Aid4Mail’s settings
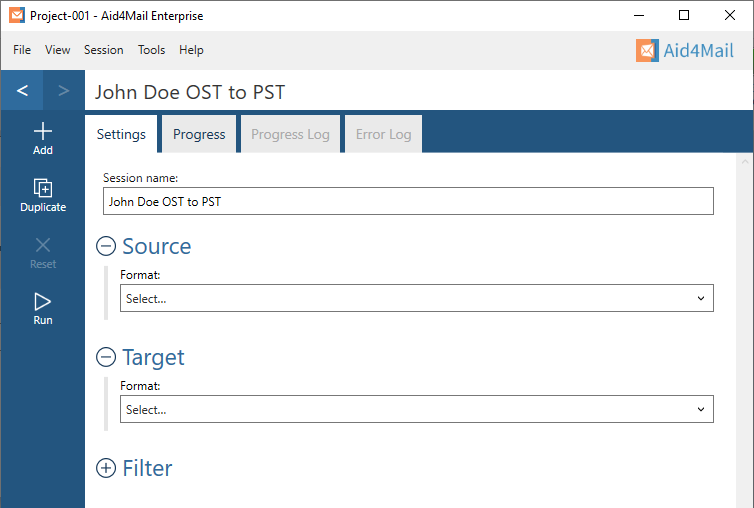
- In Aid4Mail, select the Settings tab.
- Update the Session name so it describes the task at hand. In this example, we will be converting John Doe’s OST file to a PST file so we’ve entered John Doe OST to PST as the session name.
- Below the session name there are three sections: Source, Target and Filter. Each can be displayed or hidden by selecting the +/- symbol next to the section heading. This tutorial requires them all to be displayed.
Step 2: Set an OST file as your source
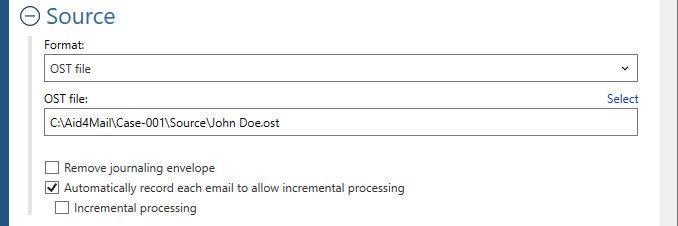
- In the Format list, select OST file.
- Specify the location of your OST file. You can write it directly in the field or use the Select button to browse your file system. By default, the Windows version of Microsoft Outlook stores OST files in this location:
C:\Users\<WINDOWS USERNAME>\AppData\Local\Microsoft\Outlook\
- Choose whether to Remove journaling envelope if your email files are journaled.
Step 3: Set a PST file as your target
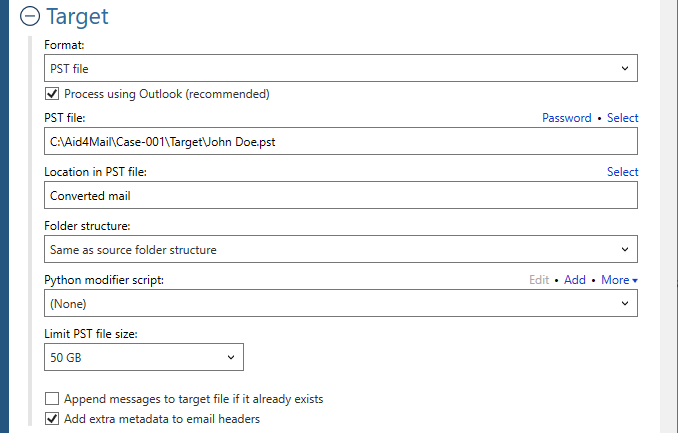
- In the Format list, select PST file.
- Choose whether to Process using Outlook. This means using Outlook’s internal engine (MAPI) to create the PST file. Using Outlook’s engine is faster but requires Outlook to be installed on the same computer as Aid4Mail. If you don’t have Outlook installed, keep this option off.
- Specify where you want your PST file to be saved. You can write directly in the field or use the Select button to browse your file system. You can also set a Password to protect the file.
- Optionally, set a folder Location in PST file. This is a folder inside the PST file where your converted mail will be saved. In our example, we have set a folder called Converted mail. This folder doesn’t exist yet but Aid4Mail will create it.
- Select an option for the Folder structure of the exported mail. Usually you’ll want to keep it the same as the original, so choose Same as source folder structure.
- Decide whether to Limit PST file size. In our example, we’ve set it to 50GB which is the maximum file size allowed by Outlook by default. Once the file has reached its limit, newly converted emails will overflow into a second PST file. And when that one’s full then into a third PST file, and so on.
- If you want to add to an existing PST file, choose Append messages to target file if it already exists.
- Add extra metadata to email headers when your chosen target format or settings would otherwise result in data loss. For example, if the target format doesn’t support some of the source format’s header fields. Or if the original folder structure would be lost due to your settings. With this option, the data is not lost but instead added to the email headers.
Step 4: Set your filter (optional)
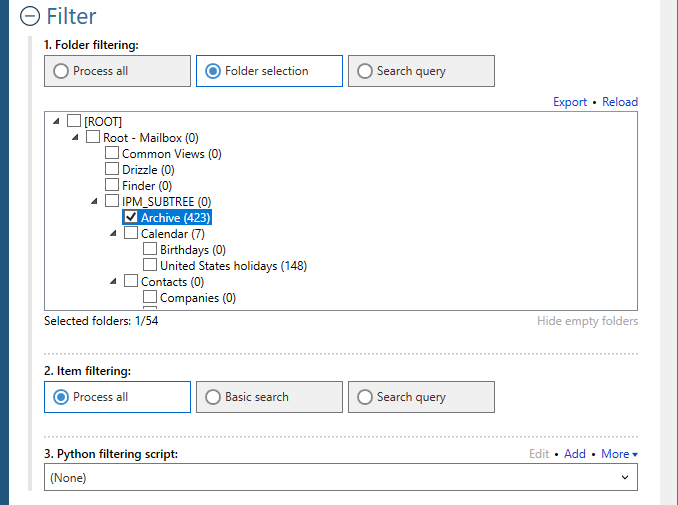
- Under Folder filtering, pick Folder selection. Your OST file’s internal folder structure will appear in the box below.
- Select the folders you want Aid4Mail to process. The others will be skipped.
Step 5: Run your OST to PST conversion
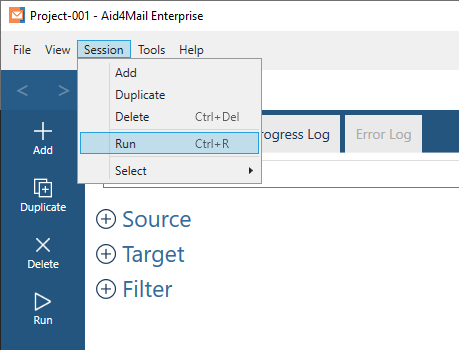
Select the Run button or Session > Run from the menu. Aid4Mail will convert your OST file to PST. It will automatically open the Progress tab so you can monitor what’s going on. Once finished, you will find full reports in the Progress log and, if relevant, the Error log.
Step 6: Open the PST file in Outlook
You can do this by selecting File > Open > Outlook Data File from Outlook’s main menu (older versions of Outlook may use different menu names).
That’s it!
We hope these simple steps to convert OST to PST were helpful. As you can see from above, Aid4Mail makes it easy to import OST file into Outlook by first converting it to a PST file.
If you need further help with your Aid4Mail conversion, we have lots of resources:
- Tutorials for most email conversions.
- Knowledge base articles.
- Aid4Mail User Guide (or open it from Aid4Mail by pressing F1).
If you still have questions, don’t hesitate to contact our award-winning Helpdesk.
To buy an Aid4Mail license, please visit the online store.
If you’d like to try Aid4Mail first, before purchasing, you can download a free trial to run your own tests. We want you to have full confidence in Aid4Mail!